People use Ethereum to create tradable tokens (which are digital assets built by creating smart contracts on the blockchain). These tokens aren't just created, they follow a standard like the ERC-20 token standard that was proposed by Fabian Vogelsteller in November 2015. Using a token standard allows interoperability across other token applications which would be discussed later in this article.
There are several Ethereum token standards existing such as;
ERC-721 (standard for non-interchangeable tokens or non-fungible tokens)
ERC-777 (standard for building extra functionality on top of tokens)
ERC-1155 (standard for creating utility tokens and non-fungible tokens).
However, the focus of this article is on the ERC-20 tokens. As mentioned previously, the ERC-721 is a standard for creating non-fungible tokens, otherwise known as NFTs. ERC-20 on the other hand is a standard for creating fungible tokens.
Fungible tokens are tokens that store values that remain the same wherever they are used. A typical example is a cryptocurrency like 1BTC which is the same in whichever country it is used. Non-Fungible tokens store data of an item that can not be replicated, for instance, a deed of ownership.
Use cases of ERC_20 token
Before moving forward, see some of the use cases that the functionalities of the ERC-20 token provide:
- Approve if a certain amount of token can be spent by another account.
- Get the token balance of an account.
- Transfer tokens from one account to another account.
- Get the total supply of tokens available.
In the following sections, you will see the implementation of these use cases listed above. For this tutorial, you will be using OpenZeppelin (which is a tool that allows you to build secure decentralized applications). It has an implementation of the ERC-20 as an ‘interface’, that is, it contains the various methods as function declarations that a proper ERC-20 token standard should contain.
This interface can be implemented to create ERC-20 tokens.

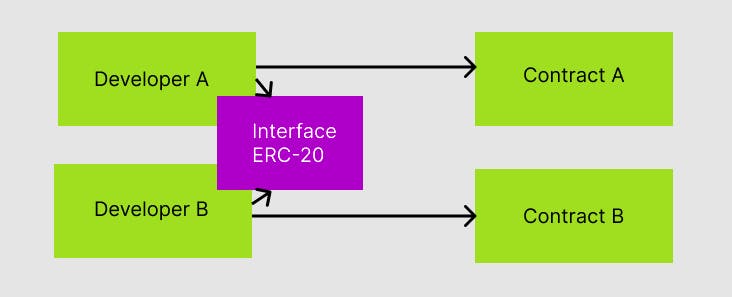
In simple terms, assume that there are two blockchain developers that want to create ERC-20 tokens. They can simply make use of the code provided as an interface in Openzeppelin and this would ensure that they both create tokens that are compatible with each other and interoperable across applications.
DEMO: Understanding the ERC-20 interface defined in OpenZeppelin
// SPDX-License-Identifier: MIT

pragma solidity ^0.8.13;

/**
 * @dev Interface of the ERC20 standard as defined in the EIP.
 */
interface IERC20 {
    /**
     * @dev Returns the amount of tokens in existence.
     */
    function totalSupply() external view returns (uint256);

    /**
     * @dev Returns the amount of tokens owned by `account`.
     */
    function balanceOf(address account) external view returns (uint256);

    /**
     * @dev Moves `amount` tokens from the caller's account to `to`.
     *
     * Returns a boolean value indicating whether the operation succeeded.
     *
     * Emits a {Transfer} event.
     */
    function transfer(address to, uint256 amount) external returns (bool);

    /**
     * @dev Returns the remaining number of tokens that `spender` will be
     * allowed to spend on behalf of `owner` through {transferFrom}. This is
     * zero by default.
     *
     * This value changes when {approve} or {transferFrom} are called.
     */
    function allowance(address owner, address spender) external view returns (uint256);

    /**
     * @dev Sets `amount` as the allowance of `spender` over the caller's tokens.
     *
     * Returns a boolean value indicating whether the operation succeeded.
     *
     * IMPORTANT: Beware that changing an allowance with this method brings the risk
     * that someone may use both the old and the new allowance by unfortunate
     * transaction ordering. One possible solution to mitigate this race
     * condition is to first reduce the spender's allowance to 0 and set the
     * desired value afterwards:
     * https://github.com/ethereum/EIPs/issues/20#issuecomment-263524729
     *
     * Emits an {Approval} event.
     */
    function approve(address spender, uint256 amount) external returns (bool);

    /**
     * @dev Moves `amount` tokens from `from` to `to` using the
     * allowance mechanism. `amount` is then deducted from the caller's
     * allowance.
     *
     * Returns a boolean value indicating whether the operation succeeded.
     *
     * Emits a {Transfer} event.
     */
    function transferFrom(
        address from,
        address to,
        uint256 amount
    ) external returns (bool);

    /**
     * @dev Emitted when `value` tokens are moved from one account (`from`) to
     * another (`to`).
     *
     * Note that `value` may be zero.
     */
    event Transfer(address indexed from, address indexed to, uint256 value);

    /**
     * @dev Emitted when the allowance of a `spender` for an `owner` is set by
     * a call to {approve}. `value` is the new allowance.
     */
    event Approval(address indexed owner, address indexed spender, uint256 value);
}
From the code block above, notice that the interface was created with the interface keyword and the name of the Interface must start with an "I".
Note that solidity programming language was used to write the code and it's what you will use to create the token later on.
Some of the use cases of the ERC-20 token that were listed earlier are actual methods that can be seen in the code block above. Here, you will understand what each of those functions does in regard to their various use cases.
Afterwards, you will create a token that implements the
interface.
- Getting the total supply of tokens: The function below returns the total number of tokens supplied in the contract. Notice the
externalandviewqualifiers used in the function declaration. Theexternalqualifier makes the qualifier to only be called by other contracts that are outside of this contract when it is deployed. Theviewqualifier signifies that the function does not change the state of the blockchain and it just returns the total number of tokens in theuint256type.
function totalSupply() external view returns (uint256);
- Getting the token balance: The function accepts the address of the Ethereum account of the owner as an argument with the
addresstype and returns the balance of its tokens as anuint256type.
function balanceOf(address account) external view returns (uint256);
- Transfering tokens from one account to another: This function basically transfers tokens from one account's address to a different address while emitting an event tagged as "Transfer".
 function transfer(address to, uint256 amount) external returns (bool);
 event Transfer(address indexed from, address indexed to, uint256 value);
The function accepts two arguments - the address of the recipient (that is, the receiver of the tokens) and the amount of tokens to be transferred as an uint256 type.
So, the caller of this transaction would most likely wait for the "Transfer" event to prove that the transaction was successful. This leads to a change in the state of the blockchain and so this function does not have the view qualifier.
- Spending tokens of a different owner: On the Ethereum blockchain, when a buyer needs tokens to be sold to him, the
allowancefunction could be invoked. The function accepts two addresses as an argument - theaddressof the owner (seller) and theaddressof thespender(buyer) and returns the number of tokens the spender can spend on behalf of the owner.
function allowance(address owner, address spender) external view returns (uint256);
Also, note that this allowance() function can be called by anybody and not just the spender of the tokens, meaning that anyone can invoke the function and be able to see the number of tokens that a certain owner allows a spender to spend.
- Approving a transaction: The allowance above can be created by calling an
approve()function. Theapprove()function accepts two arguments - theaddressof the spender and theamountor the allowance of the spender. Then, it returns a boolean value on a successful transaction.
function approve(address spender, uint256 amount) external returns (bool);
- Transferring an allowance: Now that the allowance is created with the
approve()function, to transfer the allowance from the sender to the recipient, thetransferFrom()function can be invoked. The function accepts three arguments - the address of the sender, the address of the recipient, and the amount. Then, it emits aTransferevent and returns a boolean value indicating whether the transaction was successful.
function transferFrom(address from, address to, uint256 amount) external returns (bool);
Thus far, you have seen some of the essential methods of the ERC-20 token standard that have been defined in the
interfacewith their use cases. Next, you will be building a contract that uses this interface to create tokens based on the ERC-20 token standard.
DEMO: Creating a token that implements the ERC-20 interface
This section will be a hands-on demonstration showing you how to create a token by implementing the ERC-20 interface. You will be using Remix ide online editor to build this contract.
Let's begin!
- To begin, open your Remix ide and create a file "TokenContract.sol" and within the file, add the following
interfacecode:
// SPDX-License-Identifier: MIT

pragma solidity ^0.8.13;

interface IERC20 {
    function totalSupply() external view returns (uint256);

    function balanceOf(address account) external view returns (uint256);

    function transfer(address to, uint256 amount) external returns (bool);

    function allowance(address owner, address spender) external view returns (uint256);

    function approve(address spender, uint256 amount) external returns (bool);

    function transferFrom(
        address from,
        address to,
        uint256 amount
    ) external returns (bool);

    event Transfer(address indexed from, address indexed to, uint256 value);

    event Approval(address indexed owner, address indexed spender, uint256 value);
}
Next, you'll create a contract that implements this interface above.
Creating Contract from Interface
To get started, create a skeleton for your contract with the contract keyword and use the is keyword to show that you are using the interface defined above called IERC20.
contract ErcToken is IERC20 {

}
Start by defining the SafeMath library that reverts a transaction incase of an operation overflow.
using SafeMath for uint256;
To use the SafeMath library, you have to add the following code to the bottom, outside of the contract as follows:
library SafeMath {
    function sub(uint256 a, uint256 b) internal pure returns (uint256) {
      assert(b <= a);
      return a - b;
    }

    function add(uint256 a, uint256 b) internal pure returns (uint256) {
      uint256 c = a + b;
      assert(c >= a);
      return c;
    }
}
- Defining the State Variables: To identify your token, you need a name and a symbol. To define a name and symbol for your token, you can create state variables. Also, by default 1ETH is 10^18 wei, so you can also define the number of decimal places for your token as the default 18 decimal places by creating a state variable.
So add the following code to your contract:
contract ErcToken is IERC20 {
    using SafeMath for uint256;
    string private _name;
    string private _symbol;
    uint8 private _decimals;
}
Notice that you are defining the state variables as private which means that other contracts can not read the variables. They could be set as public depending on what you choose.
- Defining the Mappings: The next thing is to define the mappings that would store the balances and allowances of the token as key-value pairs. The first mapping you will create is the one for the token balances. It will store the balances of the token with their respective addresses as key values as follows:
mapping (address => uint256) private _balances;
The second is for the allowances which specifies the amount of tokens to be spent by another account defined by its address. So, the value of this mapping will be another mapping where the first key/index is for the account owner and the second key/index is for the spender account.
mapping (address => mapping (address => uint256)) private _allowances;
- Defining Variable for Contract: The total supply of tokens was explained earlier when
interfacewas discussed. Now, you need to define a variable that would keep track of the total supply of tokens:
uint256 private _totalSupply;
- Defining the Constructor: When the contract is deployed or created, you would want to name your token, add the symbol and decimal places. You can achieve this by creating a constructor that will accept two arguments
token_nameandtoken_symbolfor the name and symbol and set each of them to the state variables you defined earlier for each.
Then, set the decimal places as the default 18. So, this constructor will be called as soon as the contract is deployed and created. Also, add an argument for the total supply of tokens as total and multiply by 10 ^ 18 wei, then, set it to the _totalSupply state variable.
 constructor (string memory token_name, string memory token_symbol, uint256 total) {
    _name = token_name;
    _symbol = token_symbol;
    _decimals = 18;
    _totalSupply = total * (10**18);
    _balances[msg.sender] = _totalSupply;
- Creating Functions that display information about the token : To improve the readability of your contract, you can display the name, symbol and decimals of your token. To do this, you'll need to create functions that when called would return all of these that have been set in the constructor:
function name() public view returns (string memory) {
    return _name;
}

function symbol() public view returns (string memory) {
    return _symbol;
}

function decimals() public view returns (uint8) {
    return _decimals;
}
Note that, you have been storing the returned string for the name and symbol in memory. This means that immediately after a function call, the name and symbol will be stored in memory which gives the contract a read and write access only.
- Getting the total supply of tokens: To read the total supply of tokens, you can create a function that returns the total supply of tokens. This function defined below will return the
_totalSupplyvariable you declared as follows:
function totalSupply() public view override returns (uint256) {
    return _totalSupply;
}
Note the
overrideused here, it allows you to override the othertotalSupply()function defined in theinterface. It will be used in the other functions as well to override the base functions.
- Returning the account's token balance: It accepts the owner of the token's address as an argument and returns the token balance of the account, using the
_balancesmapping that was defined:
function balanceOf(address account) public view override returns (uint256) {
    return _balances[account];
}
It allows you to transfer the number of tokens from the sender to a recipient with two parameters the address of the sender' and the amount to be transferred. The amount parameter is the amount that the sender of the tokens must at least have.
Within the function, you'd also need to call the transfer event that was defined in the interface:
event Transfer(address indexed from, address indexed to, uint256 value);
So, the function call would contain the owners address that is specified with msg.sender, the recipient's address, and the amount sent and returns a boolean true as follows:
function transfer(address recipient, uint256 amount) public virtual override returns (bool) {
    _transfer(msg.sender, recipient, amount);
    return true;
  }
Now, create the _transfer function used here as follows:
    function _transfer(
          address from,
          address to,
          uint256 amount
      ) internal virtual {
          require(from != address(0), "ERC20: you cannot transfer from zero address");
          require(to != address(0), "ERC20: you cannot transfer to zero address");

          uint256 fromBalance = _balances[from];
          require(fromBalance >= amount, "ERC20: transfer amount exceeds balance");
          unchecked {
              _balances[from] = fromBalance - amount;
          }
          _balances[to] += amount;

          emit Transfer(from, to, amount);
    }
So, here you created a _transfer function that accepts 3 parameters - the address of the sender, the address of the recipient and the amount to be transferred. The internal virtual allows inheriting contracts to overide the behavior of the function.
The require() keyword used here is a condition that checks if the address of the sender or recipient is zero and if it is, it throws and error and reverts the transaction.
Then it sets the balance of the spender to a variable fromBalance and checks if the balance of the spender is greater than or equal to the amount to be transferred. If it is greater or equal to the amount, it throws an error.
The unchecked performs the same function as the SafeMath library (refer to this link to get more information on why it is used). Here you're subtracting the amount from the balance of the spender.
Then, you're setting the balance of the recipient to the amount. The Transfer() event is then emitted on a successful transaction.
- Creating the Allowance: Now, create an allowance function that returns the number of tokens the spender can spend on behalf of the owner:
function allowance(address owner, address spender) public view virtual override returns (uint256) {
        return _allowances[owner][spender];
    }
To create the allowance, write another function called approve referring to its use case already mentioned earlier as follows:
function approve(address spender, uint256 amount) public virtual override returns (bool) {
  _approve( msg.sender, spender, amount);
        return true;
    }
- Spending the allowance: Create another function that would accept the addresses of the sender and recipient and the amount being spent. Then, call the
_transfer()function to spend the allowance and subtract the amount being spent from the allowance. TheApprovalevent will be emitted upon successful transaction to show that the allowance has been updated.
function transferFrom(address sender, address recipient, uint256 amount) public virtual override returns (bool) {
      _transfer(sender, recipient, amount);
      uint256 _remainingAlowance = _allowances[sender][msg.sender].sub(amount);
      _approve(sender, msg.sender, _remainingAlowance);
      return true;
    }
The first thing that happens in this function is the _transfer() function that is called to transfer the amount that is specified as an argument from the sender's address to the recipient's.
Next, create the approve() function as follows:
      function _approve(
        address owner,
        address spender,
        uint256 amount
    ) internal virtual {
        require(owner != address(0), "ERC20: approve from the zero address");
        require(spender != address(0), "ERC20: approve to the zero address");

        _allowances[owner][spender] = amount;
        emit Approval(owner, spender, amount);
    }
For, the _approve() function, it's similar to how the _transfer() function works.
It is called with the address of the caller of the transaction, followed by the address of the spender and the allowance. Then, it uses the sub() function in the SafeMath library to subtract the amount that is being transferred from the allowance that was approved. Then, returns true on a successful transaction.
Note that your code in your Remix ide should be as follows:
// SPDX-License-Identifier: GPL-3.0
pragma solidity >=0.4.22 <0.9.0;

interface IERC20 {
    function totalSupply() external view returns (uint256);
    function balanceOf(address account) external view returns (uint256);
    function allowance(address owner, address spender) external view returns (uint256);

    function transfer(address recipient, uint256 amount) external returns (bool);
    function approve(address spender, uint256 amount) external returns (bool);
    function transferFrom(address sender, address recipient, uint256 amount) external returns (bool);

    event Transfer(address indexed from, address indexed to, uint256 value);
    event Approval(address indexed owner, address indexed spender, uint256 value);
}

contract ErcToken is IERC20 {
    using SafeMath for uint256;

    string private _name;
    string private _symbol;
    uint8 private _decimals;

    mapping (address => uint256) private _balances;
    mapping (address => mapping (address => uint256)) private _allowances;

    uint256 private _totalSupply;

  constructor (string memory token_name, string memory token_symbol, uint256 total) {
    _name = token_name;
    _symbol = token_symbol;
    _decimals = 18;
    _totalSupply = total * (10**18);
    _balances[msg.sender] = _totalSupply;
  }

  function name() public view returns (string memory) {
    return _name;
  }

  function symbol() public view returns (string memory) {
    return _symbol;
  }

  function decimals() public view returns (uint8) {
    return _decimals;
  }

  function totalSupply() public view override returns (uint256) {
    return _totalSupply;
  }

  function balanceOf(address account) public view override returns (uint256) {
    return _balances[account];
  }

  function transfer(address recipient, uint256 amount) public virtual override returns (bool) {
    _transfer(msg.sender, recipient, amount);
    return true;
  }

  function allowance(address owner, address spender) public view virtual override returns (uint256) {
    return _allowances[owner][spender];
  }

  function approve(address spender, uint256 amount) public virtual override returns (bool) {
    _approve(msg.sender, spender, amount);
    return true;
  }

   function transferFrom(address sender, address recipient, uint256 amount) public virtual override returns (bool) {
      _transfer(sender, recipient, amount);
      uint256 _remainingAlowance = _allowances[sender][msg.sender].sub(amount);
      _approve(sender, msg.sender, _remainingAlowance);
      return true;
    }

    function _transfer(
          address from,
          address to,
          uint256 amount
      ) internal virtual {
          require(from != address(0), "ERC20: you cannot transfer from zero address");
          require(to != address(0), "ERC20: you cannot transfer to zero address");

          uint256 fromBalance = _balances[from];
          require(fromBalance >= amount, "ERC20: transfer amount exceeds balance");
          unchecked {
              _balances[from] = fromBalance - amount;
          }
          _balances[to] += amount;

          emit Transfer(from, to, amount);
    }

      function _approve(
        address owner,
        address spender,
        uint256 amount
    ) internal virtual {
        require(owner != address(0), "ERC20: approve from the zero address");
        require(spender != address(0), "ERC20: approve to the zero address");

        _allowances[owner][spender] = amount;
        emit Approval(owner, spender, amount);
    }

}

library SafeMath {
    function sub(uint256 a, uint256 b) internal pure returns (uint256) {
      assert(b <= a);
      return a - b;
    }

    function add(uint256 a, uint256 b) internal pure returns (uint256) {
      uint256 c = a + b;
      assert(c >= a);
      return c;
    }
}
Deploying the Contract
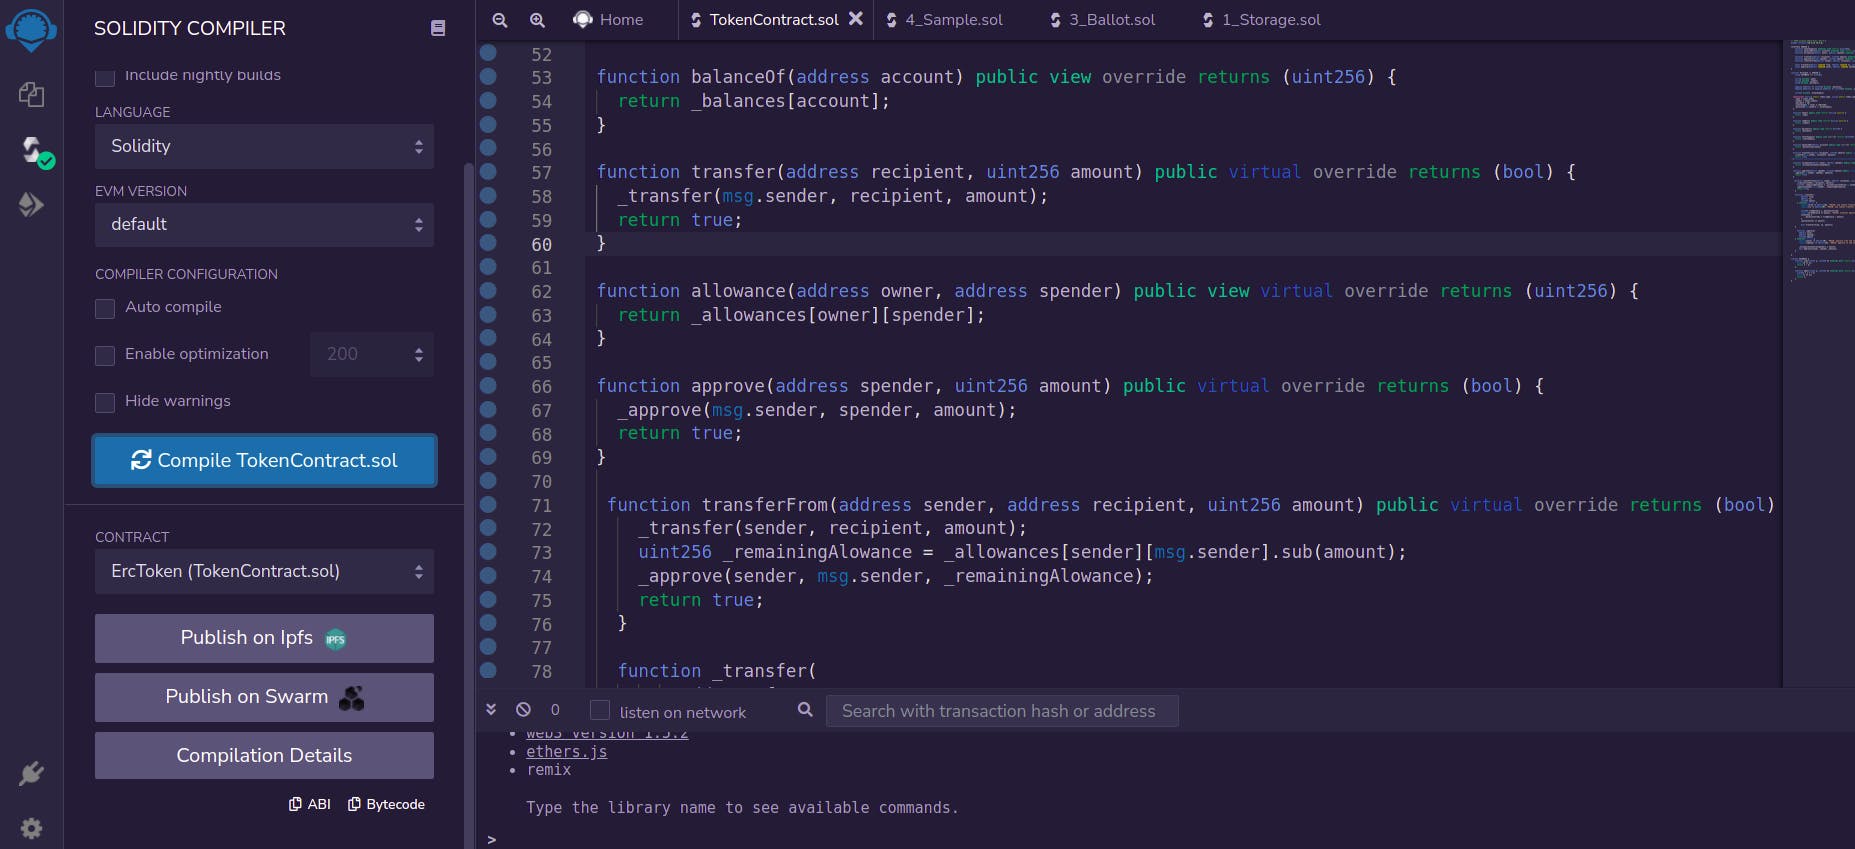
Finally, you are all set so you can compile the code in your Remix ide by navigating to the sidebar to the third button from the top and you should see the compile button.
Before compiling, ensure that you have metamask wallet installed in your browser and rinkeby test network, which is where you will be deploying the contract.
Once, you're metamask is connected to Rinkeby test network, click on the compile button:

Notice the green check showing that it has been compiled successfully.
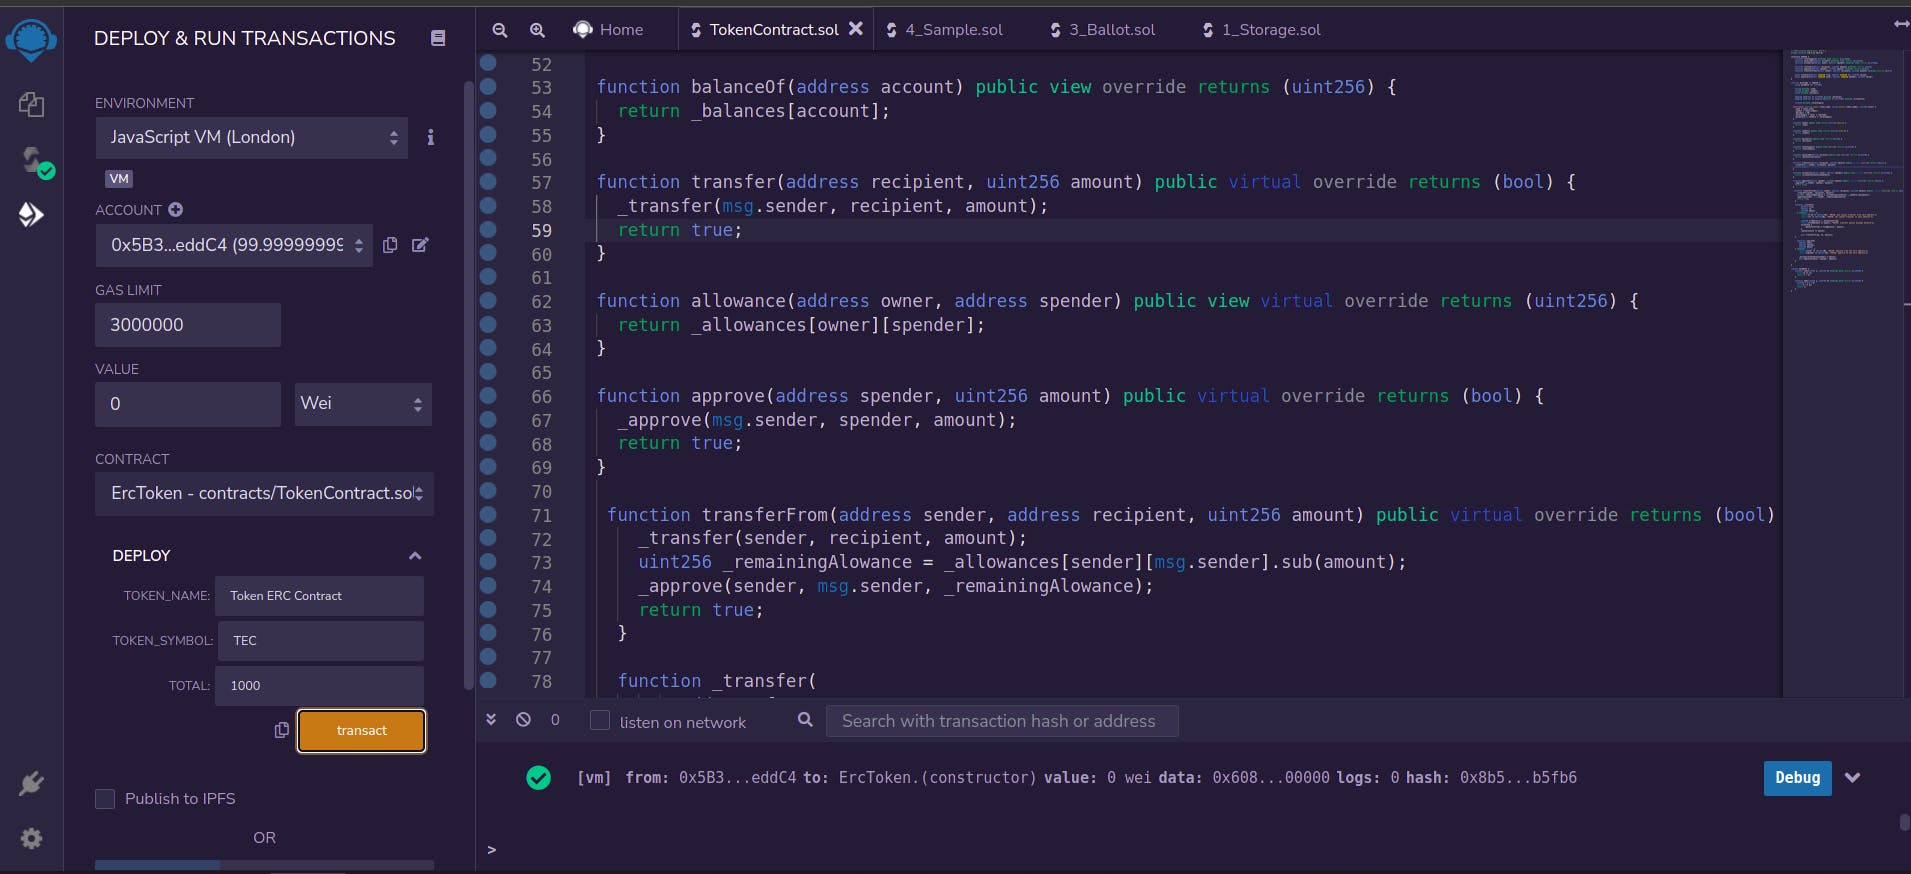
Then, click on the last button on the sidebar to deploy the contract. Click the dropdown and add the following instances; "Token ERC Contract", "TEC", 1000 for the token_name, token_symbol and total respectively. Then click on the transact button:

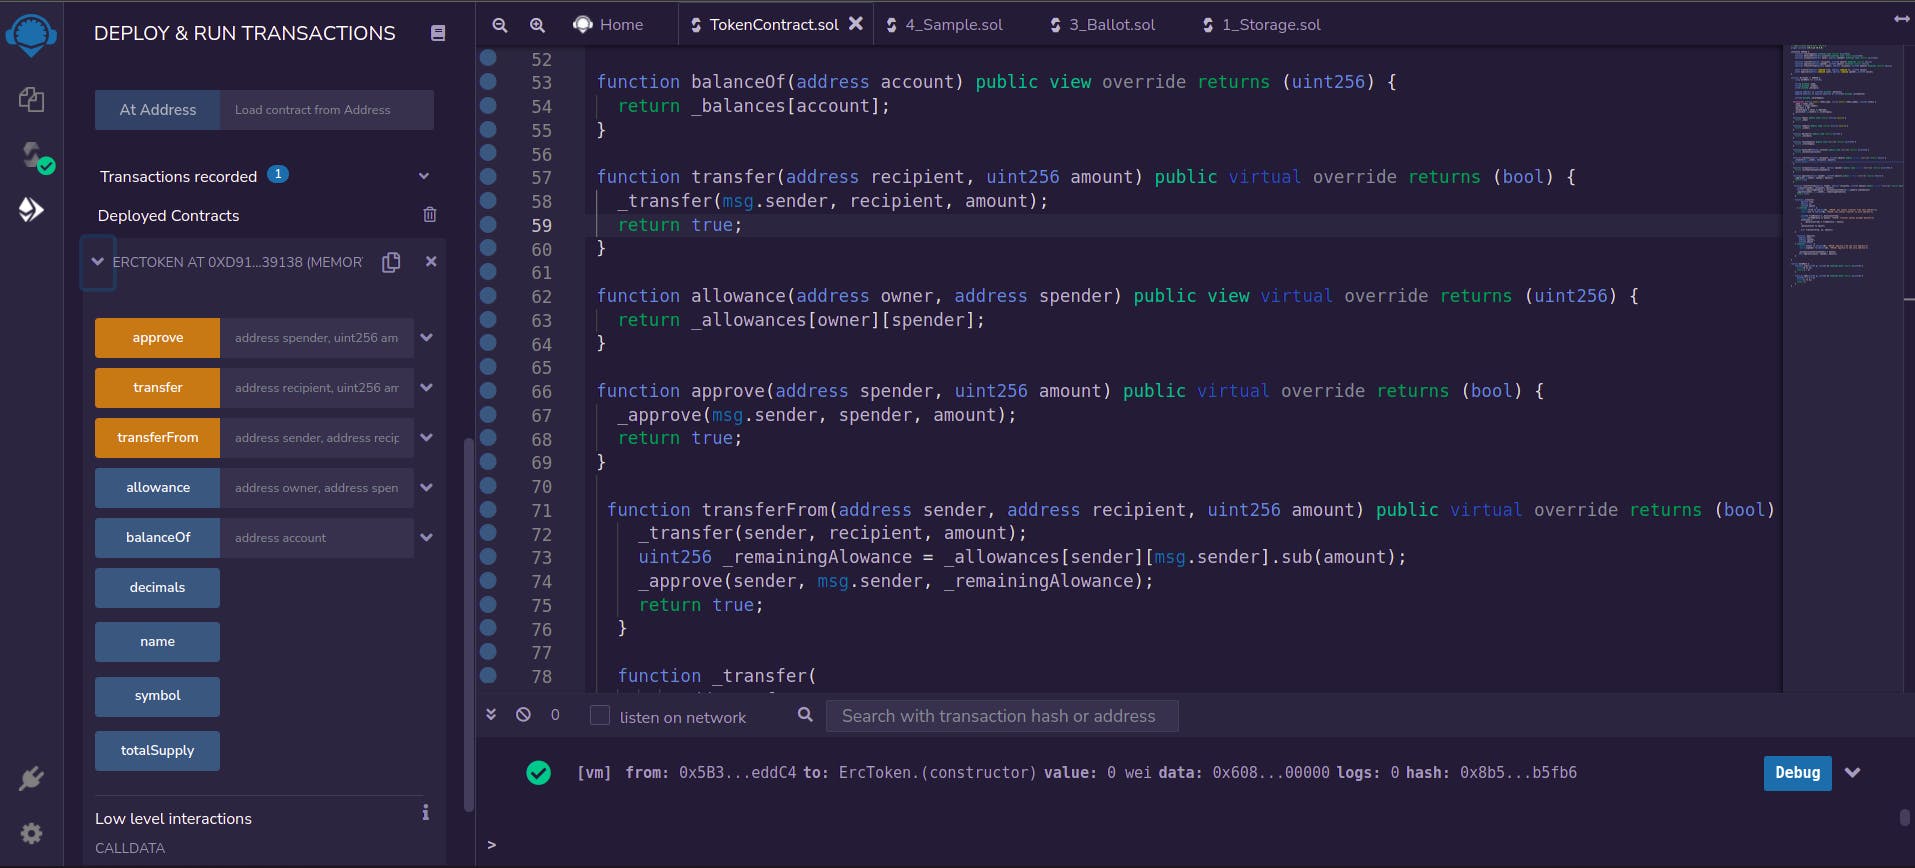
Finally, scroll down to see your deployed contract:

Conclusion
You've come to the end of the article where you created an ERC-20 token using the OpenZeppelin interface. You also learned the use cases of the methods/function declarations in the interface and how to implement them while creating a token. Good job!
